As a
beginner, exploring round patterns when knitting adds creativity and enhances
skills. When working on the round projects, it allows you to work continuously
in a spiral or full circle with knitting needles,
perfect for projects that require seamless knitting. Let's explore in this blog
the tools required, tips, and common mistakes that you can avoid.
Why Knit in the Round?
Are
you crazy about knitting in the round? Before we dive and start exploring the
tools and tips, let's find out why knitters love it:
● It's simple to adjust sizes,
lengths, or styles.
● No seams, which means no
sewing panels together.
● To make cylindrical shapes, such as socks or cowls, double-pointed
knitting needles or circular ones are considered a good option.
● Most round patterns are
straightforward and avoid confusion.
Explore Multiple Tools for Knitting
in the Round
You
don't have to buy lots of tools, but choosing the right options will make your
project:
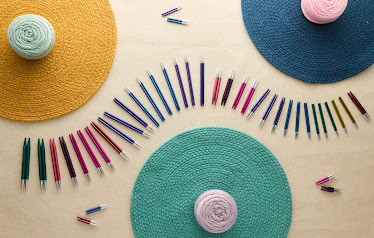
1. Fixed Circular Knitting Needles
These
are two short circular
knitting needles connected by flexible cable cords. These are available
in various lengths and are ideal for knitting from sweaters to hats. You can
use a magical loop method to
knit in the round. Additionally, with interchangeable cords and tips, you can
handle any size or stitch count. There are various options to try out from
KnitPro, such as SmartStix, Symfonie, and The Mindful collections.
2.
Double-Pointed Knitting Needles
DPNs are available in a set of 5 short pointed needles
used for knitting in small circumference, like mittens or socks. These
needles are great when circular needles are too large to handle the project.
KnitPro's Symfonie wood and Zing double-pointed needles are popular among
knitters for even tension and easy handling.
3.
Knitting Accessories
Do
you require supporting tools that help you in knitting in the rounds? These
tools are designed to work seamlessly with your needles for a smooth knitting
experience. The following are the tools:
● Stitch Markers: This will
keep track of the beginning of the round or pattern repeats.
● Finishing Needle: A Perfect
wooden darning tool from KnitPro to weave the yarn ends.
● Row Counter: In the round
project, you require counting rows, stitch pattern repetition, or an increase
or decrease in the pattern.
A Quick Guide on How to Knit in the
Round
Check
out these simple steps:
Step
1: Firstly, cast on the required
number of stitches with double-pointed needles.
Step
2: Make sure your stitches are not twisted before joining. Connect the first
and the last stitch to begin knitting in the round.
Step
3: Place a stitch marker at the beginning of the round to track your progress.
Step
4: Use the knit stitch, unless it is stated in the
pattern.
Step
5: Finally, to decrease the crowns of hats, switch to DPNs or a magic loop.
Points to follow while knitting in
the round
Follow
these tips and make your pattern creative:
● Cast-on row is the foundation
of any project, so double-check your work before joining in the round.
● Stitch markers are an
important tool, so place this at the beginning of the round.
● A small project helps in
understanding stitches like hats or cowls, so start with them before working on
the complex pattern.
● Swatch in the round and check
your gauge; it may differ from the flat knitting.
● Some prefer the grip of wood,
or some like the speed of metal. So, you can experiment with both of them.
● Switch the needle sizes if
required. Use a smaller needle size for ribbing to get cuffs or hems.
Issues and How to Prevent Them
Work
on these common mistakes:
● To avoid twisting on the
cast-on rows, lay your cast-on edge flat on the cable and double-check the
alignment before joining.
● You will see the loose
stitches when you switch from one DPN to another. Pull the first two stitches
too tightly on the new needle.
● If you don't remember where
your row starts, use stitch markers to stay organised.
● Tension may vary when
switching from one needle to another. Stick one type of material (wood or
metal) and practice tension control.
Understanding
knitting in the round is the perfect way to explore elegant and seamless
projects. You can quickly become an expert in knitting, especially in the
round, like cowls, sweaters, and socks, with the KnitPro tools, a little
practice, and knowledge of common mistakes.