Thursday, 16 February 2023

How to Work Duplicate Stitches in Knitting

 Duplicate stitches in knitting are a form of embroidery worked on your knitted fabric. To work these stitches, you do not require knitting needles but your wool needles, also known as darning, tapestry, and finishing needles. The technique gets its name because of the way the stitches are worked. The wool needle threaded with yarn follows the path of the stitch pattern (garter or stocking, etc.) and duplicates the path of the underlying knitted stitches. Stitches are duplicated for the purpose of utility or adding to the beauty. In fact, duplicate stitching is the easiest colourwork technique.

Duplicate Stitches in Knitting

If you are new to the wonders of duplicate stitches, we'll look at how to work the basic stitch, its uses, and some tricks in this blog post.

How-to Make Duplicate Stitches

To duplicate stitches you must have a wool needle, a size smaller than the knitting needle, and yarn of either the same yarn or a contrasting shade used in the fabric. You can make duplicate stitches even after finished your knitted fabric and the project is off your knitting needles or when they are still on the needles. Whether you use single-pointed needles or double points or work with circulars, you can work duplicate stitches as the knitted fabric (like a garter or stocking) made by any of the needles is the same.

Insert the wood needle threaded with yarn from the back of the knitted fabric and go through the same path of the stitch below. The trick to smooth duplicate stitching for colourwork and many other patterns is to make half a stitch. How? Well, all knitted stitches form a V and for the half-stitch take the needle through the legs of the V.

Keep a uniform tension so that the underneath stitches do not peek out or look messy. The rule to duplicate stitching is to always take the shortest route to keep the bulkiness added to the fabric minimal. For a reversible stitch pattern, start from the seam for flat projects or go as invisibly as possible for seamless patterns.

You can take your wool needle row-wise or column-wise depending on whether you want the stitches to have to point up or down. Also, the direction can be determined by the purpose, whether for utility purposes or adding to the beauty.

How to Use Duplicate Stitches

There are different purposes to use duplicate stitches. Here’s a list to make use of this stitch technique.

  1. Mending - Duplicate stitches for utility are also called "Swiss darning" and "invisible mending." Working another strand of yarn into knitted stitches thickens and stiffens the fabric. A worn fabric, for example, the heel of a dearly-loved sock or elbows of a sweater, can be mended. The colour match is critical for the fix to be undetectable.

  2. Decorating - The second use of duplicate stitches is on a perfectly sound fabric to add colour decoration. You can easily make alphabets or images and other patterns. Here using a contrasting yarn shade.

To combine utility with decoration, use the duplicate stitches to make a colourful flower over a thinning elbow, sock heel, or a little heart over a moth hole.

  1. Weaving in yarn ends – Duplicate stitches are a neat way to weave in yarn ends but first consider the stitch pattern. If you have a seam at the edge, then bury the yarn tail end there or go through the stitches in the opposite direction.

  2. Yarn Changes - When you have multiple yarns, you’ll have multiple yarn ends. To make them strong and neat use duplicate stitches to join the new yarn end.

Be it the purpose of utility or adding to the beauty, these stitches greatly help. Just makes sure to work with a round-tip finishing needle that goes quickly through the stitches and fabric. Having the right wool needle is the trick to smooth duplicate stitch technique in knitting. Just like knitting needles, wool needles are available in standard sizes determined by the diameter of the needle. Always make sure to use a darning needle smaller than the knitting needle size.

With this, get ready to transform your knitting with duplicate stitches.

Wednesday, 18 January 2023

Learn Basic Crochet Stitches

Really anyone can crochet. To make your first crochet projects, such as reusable cosmetic pads, a simple dishwashing sponge or dishcloth, a success, all you need is a few simple basic steps. In this blog post we will explain the basic crochet stitches with which you can easily start your new hobby and needle your first projects.

Learn Basic Crochet Stitches

The Beginning

Everything starts with a loop. To crochet a simple loop with cast-on knots, fold the yarn end in two, fold the resulting loop down once to create a kind of little pretzel, and then pass the crochet hook from front to back and front again through the pretzel earsand tighten slightly. Now take the long end of the thread and wrap it loosely around the fingers of your left hand. Grab the thread with the needle and thread a loop through the "pretzel ears" and tighten.

Single crochet

Single crochet stitches make up the main part of a simple crochet project. The second row is the most tedious, because here the single crochet stitches have to be placed in the chain stitches of the first row. From the third row, single crochets are set into single crochets, which is much easier to do. Stitch the last stitch of the previous row and pull the thread forward as a loop. There should now be two loops on the needle. Now pull the thread again, but without first sticking the needle through a stitch, and pull it through the two loops on the needle as a new loop. A single crochet is complete and you can continue in the same way until you reach the end of a row. Then switch to the next row by turning and crocheting back again.

Chain

Most beginner crocheters first learn to crochet chains of chain stitches that are a meter long. Children in particular often really enjoy continuing them endlessly. A chain stitch consists of only one loop, which is pulled through the previous loop and so on. Always keep the long thread loosely wrapped around the fingers of your left hand so that it can slide down evenly. Hold the cast-on knot in place with your thumb and ring finger. Try to make the chain stitches the same size as possible, you will get a feel for this over time.

Slip stitch

When stitches are to be closed, i.e. a hem is to be crocheted, or two stitches that are a little further apart are to be held together, slip stitches are used. Just like with the single crochet stitches, pierce the stitch of the previous row and pull the thread through from the back - but also through the loop on the needle so that there is only one loop on the needle.

Increase

To make your work bigger or wider, you need to gain weight. To do this, simply do the respective stitch, such as single crochet twice in the same stitch.

Decrease

In order for the size of the crochet piece to decrease again, you have to decrease the stitches. To do this, pierce the stitch and start a single crochet. Then do the same with the next stitch so that you have three loops on your crochet hook. Finally, decrease these two stitches together, so pull the loop through all three loops on the hook.

"The doer alone learneth."- Friedrich Nietzsche

With these newly learned skills, you can now tackle your first projects and thus deepen the skills you have learned. For flawless crochet fun, we recommend our beginner-friendly KnitPro Crochet Hooks and accessories.

Wednesday, 7 December 2022

What is Yarn over needle in Knitting?

Knitting a yarn over creates a small hole. This is the prerequisite for many patterns such as the popular Ajour pattern, which is very often used in knitting patterns. Yarn overs are super easy to knit. However, you have to pay attention to where the working thread lies in front of the yarn over and then wind it correctly around the right needle. Here in this blog we show you the different variants of yarn overs that are available.

Yarn over needle in Knitting

Yarn overs are represented in many knitting patterns, so it is also important to master this technique and to know the important points and variants of yarn overs. Not only certain patterns, with the help of yarn over you can also knit increases, because after a yarn over you automatically always have one more stitch on the needle. Yarn over can also be used to easily work buttonholes into the knitting project.

The first variant - knit a yarn over between a right and a purl stitch

With this variant, your yarn over follows after a right stitch. After your yarn over, a purl stitch is knitted. Here the working thread lies first behind the work.

Step 01: Wrap the working yarn that lies behind your work around your right needle from back to left front to knit a purl stitch. If you were to purl the next stitch, you would not have knitted a yarn over.

Step 02: Now wrap the working thread again from right to left around your right knitting needle. And now you have the envelope.

Step 03: Now knit the next stitch on the left as normal.

The second variant - knit yarn over between two right stitches

In this variant, your yarn over follows a knit stitch. Immediately after the yarn over you also knit a right stitch so that the yarn over lies between two right stitches. Your working thread lies in front of the yarn over behind the work.

Step 01: Wrap the working thread that lies behind your work around your right needle from back to left front.

Step 02: Knit the next stitch on your left knitting needle. To do this, insert the right needle into the stitch from right to left as usual, but with the thread in front of the work.

Step 03: Wrap the working thread around your right needle from back to front, knit the stitch as normal and let it slide off your left needle.

You now have a knit stitch on your right needle and a yarn over in front of it. The hole under the yarn over is clearly visible.

The third variant - knit a yarn over between a purl and a knit stitch

This variant is the simplest. After the left stitch, the working thread is already in front of your work. Normally you would now bring the working yarn to the back to knit a right stitch. However, you just leave it in front of your work.

Step 01: Insert the right needle into the stitch from right to left.

Step 02: Wrap the working yarn that is in front of your work around your right needle.

Step 03: Now knit the stitch on your left knitting needle as usual.

Another little tip - you can easily identify errors with yarn over by the hole, either it is too small or there is no hole at all. Then you have either wrapped the working thread around the needle the wrong way round or you have made a mistake in the execution.

"Creativity is a wild mind and a disciplined eye" - Dorothy Parker

For a flawless knitting experience, we not only offer you these tips, but of course also the best knitting needles. Choose Knitpro knitting needles and get started on your next project right away.

Do You Like this Knitpro Blog? Click here for more Knitpro Blogs like this.

Monday, 14 November 2022

How to Knit the Crochet Cast-On

For large projects like shawls or blankets where many stitches have to be cast on, a good alternative to the normal cast-on is to cast on the stitches with a crochet hook. This way you don't have to measure the yarn beforehand and worry about how much yarn you need for the necessary stitch cast-on. Most of the time it happens that we have unwound too much yarn and it ends up hanging down. You don't have to do that with this technique and the stitches also look prettier. The result is a very even, beautiful edge that looks like it has been bound off. When you crochet the stitches, you get a nice solid edge, but not a hard one.

Cast-on stitches with a crochet hook

For this technique you need a suitable crochet hook in addition to the knitting needles you need for the project. This should be the same gauge as your knitting needles. This technique can also be used with a knitting needle. In this blog we will show you both methods, with a crochet hook and with a knitting needle.

To start, you need a starting stitch on the knitting needle in your left hand. The end thread only needs to be so long that it can be easily sewn up.

Now take the crochet hook in your right hand and insert it into the stitch from the front. Get yarn and pull the loop out of the stitch. Now we are ready for the next stitch. We get the thread over the hook and pull the loop through the stitch on the crochet hook. This forms the second stitch, but do not pull it too tight. It should later be easy to lift off the knitting needle.

In order to be able to crochet the next stitch, you must now bring the thread behind the needle again, i.e. guide the wool backwards under the knitting needle. Now comes the next stitch.

Bring the thread over the needle and pull it through the loop. This is how the third stitch is crocheted. Pass the thread back under the knitting needle. This is how you crochet stitch by stitch, as many as you need for your project. If you have a few stitches on the knitting needle, you will see that this technique creates a nice row of stitches as an edge.

Cast-on stitches with a knitting needle

If you don't have a crochet hook handy, you can also use a knitting needle to perform this technique. It also works really well with a knitting needle.

So instead of a crochet hook, take a second knitting needle in your hand. The first loop is stretched out on the right as when knitting on. The loop can be a bit larger, because now we push the thumb in between, get the thread like a right stitch and clamp it between the knitting needle and the thumb. And so the wool can easily be pulled through the loop. Here, too, after tightening the new stitch, the wool must be pulled backwards under the knitting needle in order to return to the starting position. The last stitch is the loop, this is simply hung on the left needle. In the first row, knit the loop to create a nice corner.

No matter which method you choose, you can find the best Crochet Hooks and Knitting Needles at Knitpro

“Great things are done by a series of small things brought together.” -  Vincent Van Gogh

 Do You Like this Knitpro Blog? Click here for more Knitpro Blogs like this.

Monday, 31 October 2022

How to Crochet Dragonfly Stitch?

After you learn the basic crochet stitches and make some quick projects, it’s time to move on to challenging patterns. The Dragonfly Stitch is an interesting crochet stitch. If you are wondering how to crochet the dragonfly stitch, we’ll walk you through it. It is a beginner-friendly lace stitch that adds to the beauty of any simple project.

In this blog, we’ll see how it’s made but first gather your supplies.

        Crochet hook – You will need a crochet hook, this can be any hook (single-ended, double ended or even Afghan/ Tunisian hook). Just make sure you are comfortable with it. You can use bamboo, wood, steel, aluminum or anything. Having the right crochet hook size is most important. If you are following a pattern, you will have all the details. If you are planning your own design, you can guestimate with your yarn. Most yarn labels have the information. You can also make a gauge swatch to see if you are getting the look you wanted.

        Yarn – The yarn for the dragonfly stitch can be anything from your stash or as a pattern instructs. Do not attempt with heavy-weight and light-weight yarn, stick to medium ply so that you can see the stitches easily.

After you have the supplies in hand, have this handy chart of the basic crochet stitches in UK and US terms.

U.K.

U.S./Canada

slip stitch (ss)

slip stitch (sl st)

double crochet (dc)

single crochet (sc)

half treble (htr)

half double crochet (hdc)

treble (tr)

double crochet (dc)

double treble (dtr)

treble/triple (tr)

triple treble (trtr)

double treble/double triple (dtr)

tension

gauge

miss

skip (sk)

yarn over hook (yoh)

yarn over (yo)


This pattern in UK crochet terms is a small swatch of 10X10 cm.

Step 1 – Make a slip knot on the crochet hook. Start with a chain of 12 plus 3 extra for turning rows and round for the treble crochet (tr) stitch.

Row 1 - Make 1 treble crochet (tr). To make a treble crochet stitch, yarn over the hook and insert it into the 4th chain. Pull up three loops on the hook. Yarn over and pull yarn through two loops on the hook. Yarn over and pull the loop through. You will have a treble crochet stitch on hand. Continue to make treble crochet stitches in each chain until the end of the row.

Row 2 - Chain 3 and treble crochet (tr) 5 stitches. Make 1 chain. Do not chain it on a stitch but in the air. Skip 1 stitch and then make treble crochet the other six stitches.

Row 3 – Start with a chain of 3 stitches. Make 2 treble crochet (tr) stitches. Chain 3 in the air and then skip 3 stitches. Make 1 treble crochet stitch in the space of the chain of the row below. Once again make a chain of 3 stitches in the air and then skip 3 stitches. Finish the row with 3 treble crochet stitches.

Row 4 – For this row, chain 3 stitches and make 1 treble crochet (tr). Chain 4 stitches in the air and then skip 1 stitch. Make a double crochet stitch on the treble crochet stitch (tr) of the row below. Once again follow the pattern of 4 chain stitches in the air, skip over 1 stitch and finish off with 2 treble crochet (tr) stitches.

Row 5 - Chain 3 and make 1 treble crochet (tr). Continue with 4 treble crochet (tr) stitches in the space formed by the chains of the row below. Make a treble crochet 1 above the double crochet of the row below, 4 treble crochet in the space formed by the chains of the row below and 2 treble crochet.

Row 6 - Make 1 treble crochet in each stitch.

Continue the steps of crochet rows 2 to 6 till you have reached the desired length or the pattern instructs you to.

With these steps, you can easily crochet this fancy lace texture. The Dragonfly Stitch adds to the beauty of blankets, scarves, or garments.

Friday, 14 October 2022

Things Every Knitter Needs

Knitting is a fun craft, after all, you only need three simple things: knitting needles, yarn, and creativity.  But, there are also a few “things” that can make knitting a lot easier and fun. Be it the beginners or the advanced crafters, every knitter needs some help. Before you go and get your hands on everything possible, check out our list of knitting essentials.

1. Knitting Needle Sets

In knitting, of course, you will need knitting needles, but the collection is never complete until you own all three types of needles and the popular sizes. A pair of single-pointed needles are handy to knit most rectangular projects in back-and-forth knitting. The circular needles are two 10 and 13 cm length tips joined by cables varying between lengths of 25cm to 150cm. If you do a lot of knitting you might want to get an interchangeable circular needle set which will offer flexibility. You won’t need new sizes for each project, as a set offers multiple. Plus, if your project calls for changing needle size or even the cable length you can easily go ahead with it. Double-point needles are ideal for knitting small things in the round, like mittens or the top of a hat.

Many times you may need to switch needles. You may start a project on circular needles, then switch to double points as you get close to binding off or knit different sections on different needles, so it is always recommended to include all needles in your collection.

Knitting Needles Set

2. Yarn

Obviously yarn, given the fact that knitting is fiber art. There are so many types, different weights, different fibers, different colors, etc of glorious yarn. Too much to possibly mention, but suffice it to say, you never have enough. For every project, you need different yarns. The ones that work best for socks may not be the right fit for a sweater, the ones you use to practice new techniques may be only used for practice and not any actual project.

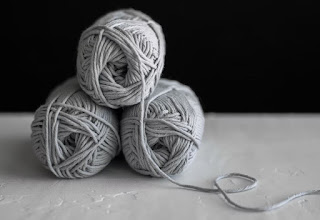
yarn

3. Scissors

A pair of sharp scissors is always handy for a maker. You need it to cut the yarn when you finish your project or want to switch colours.

Scissors

4. Tapestry Needle

A basic need for any knitter, a darning needle is a large sewing needle, with an eye big enough to accommodate bulky yarn. You’ll use the needle to weave in the tails of yarn left after you bind off your project or for different techniques and even seam projects together.

5. Stitch Markers

Like its name, stitch markers are used on your needles to mark particular points in your pattern. Some markers can be directly put onto a stitch such as locking ones, while cute round designs stay on the needles for reference in a particular stitch or pattern.

Stitch Markers

6. Measuring Tape

As a maker, you would want to work on your own designs and for that measuring tapes are handu. Also many times, a pattern mentions inches, rather than rows, so it's better to keep them on hand. Measuring tapes will not leave you guessing.

7. Row Counter

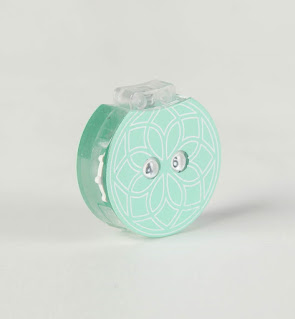
Some patterns require keeping track of exactly how many stitches and rows you have knit, and a row counter helps you keep an accurate count.

Row Counter

Know More: How to Use Row Counter for Knitting

8. Blocking tools

Yarn blooms beautifully after being blocked and blocking tools assist you in this. Any yarn of any project requires some pampering and blocking does that.

Know More: How to Block your Knitting

With the above knitting-related things, you are ready to knit anytime and anywhere!


Tuesday, 13 September 2022

Learn How to Knit Flat Using Circular Needles

Circular knitting needles are very versatile, they are suitable for both round and flat projects. When you crochet flat projects with circular knitting needles, you have the great advantage that the weight of the entire project is distributed over both hands at the same time and not on one needle, as is the case with single knitting needles. Another advantage is that larger projects have much more space, with interchangeable knitting needles, needle size and cable length can be individually selected and put together. So you can put together the ideal circular knitting needle for your project.

Learn How to Knit Flat Using Circular Needles

Single pointed knitting needles are long and rather unwieldy. Especially if you like to take them with you and transport them. It's different with circular knitting needles, because they have such short needles and flexible cables, they can be conveniently packed in your handbag and taken with you. And because you can slide the knitting onto the cable, there is less risk of stitches slipping off the needle when you put the work down or take it out of your pocket.

Types of Circular Knitting Needles

Circular Knitting Needles consist of two short knitting needles connected with a cable. There are two types of these, the fixed circular knitting needles and the interchangeableknitting needles. As the name suggests, fixed circular needles are firmly connected to one another, embroidery needles and cables cannot be unscrewed. Knitpro offers a wide range of different needle sizes and cable lengths.

Interchangeable Knitting Needles can be assembled individually. With an interchangeable knitting needle set you are perfectly equipped for all imaginable knitting projects. As Knitpro, we also offer a large selection of many different interchangeable knitting needle sets.

How to Knit Flat Projects with Circular Knitting Needles

Knitting with circular needles is the same as with single pointe needles. For a flat project, simply crochet in rows, so after each row turn your work and knit back and forth.

You can also crochet round projects in rows and then sew the ends together, like hats or loop scarves. But with circular knitting needles you also have the option of knitting the project in the round and thus saving on sewing. This not only gives you an invisible transition without a seam, but also saves you valuable time. With circular knitting needles, the choice is yours. You can even knit entire sweaters without having to sew anything - so-called raglan sweaters. You can also switch from rounds to rows in a project to knit specific areas of a project.

"What is conceivable is also feasible" - Albert Einstein

Everything imaginable can be realized with our circular knitting needles. Check out our wide range of Fixed and Interchangeable Circular knitting needles and try your hand at knitting your next flat project with circular needles. You will be enthusiastic.

Did you like this Knitpro article and would you like more? Then click here for more posts like this from Knitpro.