Saturday, 7 June 2025

Summer knitting patterns to get on your needles


Don't put your knitting needles away because summer is the ideal season to begin new projects!  Welcome the warm season while maintaining your creativity with lightweight yarns and breezy patterns. We have shared some interesting ideas for your projects in our blog to inspire you to create lovely designs.


Explore Trendy Summer Knitting Projects


Make your summer season memorable and start designing creative patterns that are not only useful but also fashionable. Here are some inspiring ideas:


1. Lightweight Tank Top:

 A fashionable and breathable tank top is the essence of summer. Cotton is the right yarn for summer knitting because it's cool, soft, and long-lasting.


Recommended Pattern: You can use simple stockinette with a bit of lace at the hem, and make a lightweight top. Add versatility for layering and is easy to style with shorts or skirts. You can work with circular knitting needles or single-pointed ones. Read our blog to learn the difference between straight vs circular knitting needles.


2. Breezy Summer Cardigan:


Enjoy a summer evening or night by making a lightweight cardigan because it can get a little cold.


Recommended Pattern: For making this stylish design, make it a loose, flowy fit with an open front. Use linen yarn to knit this beautiful pattern. You can wear this over dresses or tank tops that look stylish. Learn how to knit a cardigan on single-pointed knitting needles.


3. Simple Summer Socks


Winter isn't the only season for knitted socks! Light and breathable, summer socks look great with sneakers.


Recommended Pattern: You can try a short ankle length, ribbed cuff design, a great way to use up sock yarn, and perfect for travel knitting. Double knitting needles from KnitPro in Symfonie, Zing, Nova, or Dreamz are considered ideal for small projects. Refer to our blog to learn the best knitting needle for socks.


4. Stylish Crop Top


A quick and enjoyable knit that gives your summer wardrobe a handmade feel is a knitted crop top.


Recommended Pattern: Experiment with ribbed hem, lace details, adjustable straps, and make fashionable designs using cotton yarn. You can wear over dresses or high-waisted jeans. Explore these fresh knitting ideas for spring with our blog.


5. Delicate Summer Dress


Knitting a breezy summer dress is the perfect fashion statement if you enjoy a challenge.


Recommended Pattern: Add flowing A-line shapes and lace panel details to make it more attractive using bamboo yarn.


Why Knit in Summer?


Knitting isn’t just a winter hobby! Here’s why summer knitting is a must:


     You can work on small, lightweight projects like market bags, lace shawls, and tank tops anywhere.

     Windy fibers replace bulky wool with cool, airy, and lightweight yarns.

     Knitting is a calming and relaxing activity that you can enjoy doing in air conditioning, on the beach, or by the pool.

     Knit chic, trendy patterns that you can wear immediately!


Things to Keep in Mind


Here are some tips and guidance for you:


     Why not starting  summer projects with lighter fabric? Knit using yarn that has soft, moisture-absorbing properties, such as cotton blends, linen, or bamboo.

     To give uniqueness to your project, use neutrals, pastels, and white colors to reflect heat and appear fresh.

     Choose small projects like accessories, tanks, or lace tops.

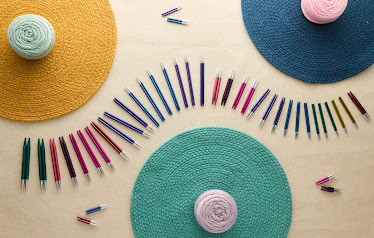
     If you don't know which needle is best to work with, buy a complete knitting needle set from KnitPro in Symfonie, Dreamz, Karbonz, and the mindful collections, which include multiple knitting needle sizes for you to try.


Why not make something unique and creative with your hands? Knit and relax at home, by the pool, or traveling with friends,

Make your needles busy this summer, and start knitting simple and creative projects that enhance your creativity.

Saturday, 31 May 2025

How to Crochet a Moss Stitch?

Learning new stitches can enhance your skills, especially the ones that are also used in knitting. The moss stitch is one of the most widely used methods for creating a rough yet sophisticated effect with a crochet hook. In this blog, we have shared everything you need to know about the moss stitch, how to make it, and projects in which you can use it.


Understand Moss Stitch In Crochet


Moss stitch is not just for knitters, so don't get confused. Even when using this stitch in crocheting, you can make patterns that produce a dense textured fabric. It is referred to as the linen, granite, or woven stitch and has a distinctive woven appearance due to alternating single crochet (SC) and chain stitches. You can read our blog on how to knit the Moss stitch in easy steps. It is a beginner-friendly, one-row repeat, lays flat, and has a soft drape, perfect for blankets, scarves, or dishcloths.


What Materials Do You Need?


To start learning a new skill, let's first gather all the materials:


1. Crochet Hook: a 5.00mm hook is ideal for moss stitch, a single-ended crochet hook is the most common, you can choose from KnitPro in Zing, Waves 2.0, and Oasis crochet hooks available in full ranges, and comfortably fits in your hand.


2. Yarn: Moss stitch is flexible and works with almost all yarn types. As a beginner, start with medium-weight yarns to see the stitches.


Crochet Abbreviation


Chain- CH

Single Crochet- SC

Stitch- St

Chain-1 Space- Ch-1 sp


Note: In US terminology, a single crochet refers to SC, while in UK terms, it's double Crochet (DC). Read our blog to learn about crafting language and UK vs US terminology.


Step-by-Step Instructions to Crochet Moss Stitch


Now that you have all the necessary material, let's learn this stitch:


1. Step 1: Create a Foundation Chain


     Make an even number of CH with a wooden crochet hook. Your project's width will depend on how long this chain is.


2. Step 2:  Work with First Row


     Work with SC in the 2nd CH from the hook. Learn how to make single crochet with a single-ended crochet hook.

     Then, Ch-1 sp from the previous row, work another SC in the next CH and skip the next chain.

     Work in the same technique until the row is finished.

     Turn your work and CH one, it's not a St.


3. Step 3: Work With Second Row


     The first CH serves as a turning chain.

     In the ch-1 space from the previous row, work a SC.

     CH 1: Work another SC in the subsequent ch-1 space, skipping the subsequent SC.

     Continue in the same manner throughout the row.

     Turn your work and repeat steps 2 and 3 until you reach the desired length.


Best Patterns Using Crochet Moss Stitch


The Moss stitch is perfect for most projects. Here are some ideas for you to explore:


     Cozy Blankets design: As you know, the Moss stitch has a flat and even texture, making it perfect for blankets.

     Beautiful Scarves and Cowls: Due to the lightweight and breathable texture, ideal for beautiful scarves and cowls.


Benefits of Using Moss Stitch in Crochet


Here are some benefits that you can enjoy:


     One of the benefits is that the stitch looks similar on both sides, and you don't have to worry about which one is right or wrong.

     Perfect for beginners, because it just requires the knowledge of basic stitches such as SC and CH. Become a master in 5 basic crochet stitches.

     If you want to make a pattern or design that uses two colors, use a double-ended crochet hook from KnitPro in Symfonie and Trendz.

     Moss stitch produces a flat fabric that does not curl due to alternating SC and CH.


Tips and Tricks for Successful Moss Stitch


Here are some common tips that you can use when working with moss stitch in Crochet:


     To avoid uneven edges, count stitches at the end of each row to ensure consistency.

     Use a larger crochet hook to achieve a loose tension.

     Stitch markers from KnitPro in metal or other charming shapes are a must for tracking important sections in the project.


Moss stitch adds a distinctive texture and a sophisticated finish to any project, whether you're creating blankets, scarves, or lovely dishcloths. You can enhance your crocheting experience and make gorgeous designs with Tunisian crochet hooks, slightly resembling knitting needles. Available in various materials from KnitPro in Symfonie, Dreamz, or Ginger. Read our blog on how to choose a Tunisian crochet hook for beginners.


Monday, 5 May 2025

Free Summer Knitting Patterns You’ll ACTUALLY Want to Knit


Do you enjoy making knitting patterns in the warm season? As you know, knitters usually like colder days to make their patterns. Summer is generally enjoyed by relaxing in the sun, being in flowers, and exploring creative projects with knitting needles. Despite so many constraints, you can still create versatile and unique projects like you do in winter. Let's get started with some enjoyable knitting ideas on our blog. Read our blog for free summer knitting patterns.


Summer Knitting- Which Yarn to Work With?


Summer knitting is always challenging, especially for beginners, because they search for fibers that offer breathability and a breezy feel, such as cotton, linen, and bamboo. Cotton is a durable and soft fiber, perfect for any summer projects. Linen fiber is made from flax plants and known for coolness, freshness, and sheen, is ideal for hot weather projects. Bamboo is well known for lightness and softness and has a beautiful drape quality.


Free Summer Knitting Project Ideas


Summer is a perfect time for exploring your imagination and helps you to apply it in making creative patterns. Here are some free patterns that you love to work on:


  1. Breezy Knitted Cardigan


Skill- Intermediate

Yarn-  Cotton or linen


Enjoy chilly summer evenings by creating an open, lightweight cardigan. This loose style is ideal for wearing over a swimsuit or tank top. You can use Symfonie or Zing circular knitting needles from KnitPro in larger sizes to make it quickly. You can choose cotton or cotton blend to create this unique project.


  1. Market Bag


Skill - Beginner and Intermediate

Yarn- Cotton


Make your own reusable market bag by knitting instead of using plastic ones! It is ideal for taking your essentials to the beach or grocery shopping. This easy project can be created by starting knitting in flat and then joining it in the rounds with Dreamz, Karbonz, or Nova double-pointed knitting needles.


  1. Cotton Knitted Summer Shorts


Skill- Intermediate

Yarn- Cotton or bamboo


To make cotton shorts, you must know how to knit in rounds, increase, and work on simple shaping. Also, knowing bind-off and cast-off methods is essential. It is the perfect way to lounge in summer. Always remember to gauge swatches before you begin your project to get an idea of how your creation will look.


  1. Cancum Summer Top


Skill- Intermediate

Yarn-  Lace yarn


Create this lovely knitted pattern with basic lace stitches for creativity and texture. You will love this boxy and loose design, and can also customize the sleeve length according to your requirements.


  1. Breton Striped Sweater

Skill- Intermediate to Advanced

Yarn- Bamboo or Linen


The ideal transitional item from summer to fall is a timeless striped sweater. This classical knitted striped looks perfect with shorts or jeans. You can work with Trendz or Karbonz circular needles from KnitPro. Add a twist by simply changing the colors in between the pattern.


  1. Lightweight Knitted Lace Shawl


Skill- Intermediate

Yarn- Lace weight yarn


A delicate lace shawl is an excellent accessory for crisp summer evenings or nights. Basic stitches, such as garter or stockinette, are good options for beginners.  For the lightweight project, opt for lace yarn, and if you want to add versatility to your project, circular needles are the best option.


  1. Lakeside Beach Wrap


Skill- Intermediate

Yarn- Lace weight yarn


A stylish and functional beach wrap is a fantastic summer knitting project! This open-knit design lets your swimsuit peek through while keeping you covered. Beach wrap works up quickly with larger needles. You can explore KnitPro's knitting needle sets in Symfonie, Ginger, The Mindful Collections, etc, which offer multiple sizes for you to try out.


Things to Keep in Mind for Summer Knitting


Knitting in summer is challenging, whether you are an experienced knitter or a beginner. Let's check out some points:


  • Choose wooden or bamboo knitting needles for summer instead of metal because your hands feel cooler.
  • Lightweight fibers work best for projects that require comfort and are breathable; cotton, bamboo, or linen is a perfect choice.
  • Wash your hands before knitting to prevent sticky hands, and take breaks between knitting so that you won't stress out.
  • Work on smaller projects such as dishcloths, bags, or accessories to finish the project quickly.


Summer knitting is perfect for making fashionable, lightweight fabrics and accessories that suit the warm climates. The above free summer knitting patterns will keep your needles busy while you create lovely and useful items.

Friday, 25 April 2025

How to Knit a Chunky Blanket?


Are you ready to create a large, easy, and quick project? You can knit a unique and cozy project like a chunky blanket. Oversized designs are in the spotlight these days. These large blankets make wonderful gift items for your loved ones and are created easily with knitting needles. Moreover, the structure is luxurious compared to a normal knitted blanket. Let's go through all the details and successfully knit a chunky blanket. You can read our blog on how to knit a blanket on circular needles.


Which Yarn is Considered for Knitting a Chunky Blanket?


Use wool or acrylic fiber, machine washable, for knitting a chunky blanket. Another point you can consider is to choose a yarn that is not 100% wool in its weight; becuase woolen can be heavy and weigh up to 5 or 6 pounds. These bulky throws are perfect for people suffering from a sleep disorder or ADHD syndrome. Choose a lightweight or fluffy yarn for those who are not suffering from the above diseases. Read our blog for everything you need to know about chunky yarn.


Bulky yarn is labeled as 'weight 5'. These yarns are thicker than the worsted-weight yarn and take fewer stitches to complete the project. For example, if you buy a yarn between 24 and 34 yards per skein, it could be super bulky or jumbo, which is best for a chunky blanket.


Rough Estimation for Chunky Blanket (between 24 and 34 yards)


For Adults: 10+ skeins of yarn (depending on the size)

For Toddlers: 8-10 skeins of yarn  (depending on the size)


What Type of Knitting Needles are Best?


Arm knitting is possible for making chunky blankets. But using needles will save your hand from strains. KnitPro's Jumbo circular needles are made from birchwood and available in various lengths and sizes, with a smooth finish and amazing strength. The flexible cable ensures the weight is divided proportionally, allowing you to work on big projects.


Which Stitches Are Perfect?


If this is your first time, we recommend starting with a simple pattern. Garter stitches are the easiest ones; you just know the basic cast-on method and knit stitches. If you are working with the garter pattern, which means all knit stitches will appear as purl stitches on the other side, making it ideal for a blanket. Enjoy the complex patterns as well if you know the basic stitch knowledge.


Step-by-Step Instructions to Knit a Chunky Blanket


Follow these simple guidelines below and make your first project:


Step 1: First, cast on 60 stitches following the longtail cast-on method and knit six rows in a garter.


Step 2: In this pattern, knit three stitches for the edges on the RS (right side) of the work. Knit one stitch and Purl one until you reach the last three stitches, which are to be crafted in a knit stitch.


Step 3: Knit the first three stitches on the wrong side (WS) of the item. Then, Purl the first stitch and knit the next. Repeat the pattern until you reach the last three stitches and knit them again.


Step 4: Repeat 2 - 3 steps till you reach the desired length in your blanket.


Step 5: Trim extra yarn and weave the loose end with a darning needle.


Tips for Beginners


  • Choose the right needle and yarn for this project. The needle sizes that work are generally 5.5mm (US 9) - 8 mm (US 11). Make sure the chunky yarn weight matches the needle size.
  • Bigger-sized needles and yarn are quick to work with, but ensure a relaxed tension, otherwise, you can get tight stitches.
  • Make sure to start your project by making a swatch to see how your yarn will behave.


Knitting needles play a significant role when working with a bulky or chunky yarn. KnitPro includes top options for wooden and metal. Wood offers a good grip and ensures the chunky yarn does not slip, ideal for beginners.


You can also work with Knitpro's Dreamz collection, which is available in vibrant colors and is lightweight. The polished surface ensures swift knitting, ideal for chunky yarn. Explore circular knitting needles from KnitPro in the Mindful collection, which are perfect for knitting large projects such as blankets. Symfonie, Ginger, Bamboo, Nova Platina, and even Cubics help you with chunky knitting.


Tuesday, 8 April 2025

Knitting Needle Materials (What to Choose!)[pros and cons]


The material of the knitting needles plays an essential part in making your creation elegant. As a knitter when you plan your knitting journey, you will find various options on the way such as wood, metal, plastic, or carbon. Hence it's become tricky to make the right decision, so let's unravel the pros and cons and suggest some good options in this blog.

Materials Used in Knitting Needle?

Choose the knitting material that matches your project requirements. Every material has distinct features, some of which help in your fast knitting process, however, the beginner must consider the material first.

  1. Wooden Knitting Needle

When thinking about wooden needles- you get a warm and natural feel. You will find several options besides you, like needles in birch, rosewood, and bamboo. KnitPro's wooden needles, including the popular Symfonie series, Dreamz, Basix, and J'dore cubics, are famous due to their smoothness and great quality.

Pros

  • These wooden needles are perfect for long sessions due to their warm nature.
  • Beginners will love to work on these needles because of the wood's texture which prevents yarn slippage.
  • These needles are lightweight and affordable, making them suitable for beginners starting out their knitting adventure.

Cons

  • In wooden needles, thinner ones are not the best choice, becuase they are more prone to splitting or breaking if more pressure is applied to them.
  • If you are looking for speed then metal needles are best to consider due to additional fraction.
  1. Metal Knitting Needles

Expert knitters love the speed and accuracy of metal knitting needles made of stainless steel or aluminum. KnitPro provides various ranges of smooth and long-lasting needles such as Zing, Nova series, SmartStix, and Mindful collection.

Pros:

  • Strong and resilient.
  • Due to the smooth surface, yarn glides easily and helps in quick knitting.
  • Metal needles are suitable for tight twists or slippery fibers.

Cons

  • Especially during the winter, metal needles become cold and it's become hard to hold them.
  • Beginners can drop the stitches due to excessive slickness.
  1. Carbon Fiber Knitting Needles

A more recent invention is a carbon fiber knitting needle that combines the greatest qualities of wood and metal. You can explore the exceptional quality of Karbonz from KnitPro.

Cons

  • Despite being extremely lightweight, they are strong and long-lasting.
  • These needles are warm and comfortable for knitting in winter.

Pros

  • The needles are expensive compared to other materials.
  • The carbon needles can break or shatter if used beyond their limit.
  1. Plastic Needles

Due to the low price of these needles, these are considered best for beginners to start their knitting adventure.

Cons

  • Inexpensive, lightweight, and good grip, a perfect combination.

Pros

  • It can be bent or broken under high tension, so these are not as durable as other needles.


A Quick Guide on Knitting Needles (Materials)


Wood/Bamboo

Stainless Steel

Carbon

Plastic

Aluminium

Speed

Slow while knitting

Fast while Knitting

Medium

Medium

Fast

Weight

Light

Heavy

Light

Very Light

Medium

Sound

Quite

Noisy while knitting

Medium quiet while Knitting

Medium while knitting

Noisy while knitting

Temperature/feel

Warm feel when touching

Cold feel

Cold feel

Warm/ slight texture

Cool/smooth


Type of Needles according to the Shape

The next step is choosing the type of needles available in various forms. Here are some examples:


  1. 1. Single Pointed Needles


The majority of starter kits come with these traditional needles. For flat knitting projects like blankets and scarves, they are ideal.


  1. Circular needles


Because of their versatility, circular needles can be used for round and flat knitting. They work well for larger projects like Afghans and sweaters. The Nova Cubics and other interchangeable circular needle sets from KnitPro provide simplicity and versatility. Learn more about circular needles by checking our blog on 10 reasons why we love circular knitting needles.


  1. Double Pointed Needles

 KnitPro's DPNs such as Symfonie, Bamboo, or Karbonz are available in a set of five and are used for small circumference projects such as socks, hats, or gloves.


These needles are available in various lengths, while choosing these, consider the project requirements. Read our blog on how to choose the perfect knitting needle for your yarn.


When choosing the material for your needle, it ultimately depends on your preferences and the kinds of projects you're working on. Due to the inexpensive and lightweight nature of plastic, metal needles offer speed 


Tuesday, 25 March 2025

How to Corner-To-Corner Crochet?


Corner-to-corner (C2C) is one of the popular methods for adding a fun and creative touch to your crochet project with crochet hooks. Where you work diagonally across, creating a textured and stunning design, such as blankets or scarves. Once you master this method, it produces stunning shapes like squares, rectangles, and even complex structures, perfect for beginners and experts. So, why not enhance your skills right away with this wonderful technique? Let's explore step-by-step how to create C2C and tips for making it successful.


What is Corner-To-Corner Crochet?


In a corner-to-corner (C2C) technique, you start at one corner, and work diagonally across. In this crochet, increase the size of your creation until it reaches the appropriate width, then decrease as you finish. You can use this method on a garment where you need a diagonal texture. All you need to know are basic crochet stitches and the ability to follow simple increase and decrease methods.


Why you should try C2C Crochet?


C2C allows endless creativity and design in color choices. Moreover, you can achieve complex designs like images or patterns, using color changes to create pixelated designs.


Check out the reasons why you should try C2C:


  • You can create pixel art-style projects.
  • With this method, you can use the leftover yarns and create a colorful pattern.
  • The perfect way to show variegated yarn in your project.
  • You can easily adjust the size and add more rows to make the project larger.


What Materials Do You Require for C2C?


  • Yarn: Begin your project with worsted-weight yarn, due to its smooth texture and drape.
  • Crochet hook: You can work with a single-ended crochet hook from KnitPro in Symfonie, Waves 2.0, or Dreamz, which can easily handle the slippery yarns and pick up the stitches fast.
  • Crochet accessories such as a scissor and a wool needle, stitch markers, and a row counter will help in your crochet work.


Crochet abbreviations


CH: Foundation Chain

DC: Double Crochet

SS: Slip Stitch


Double crochet (DC) is a common stitch name known in UK terms, however, it's single crochet in the US. The same goes with Slip Stitch-SS in UK terms, while SL ST is in the US.


Step-by-step instruction


After gathering your supplies, let's explore how to perform the corner-to-corner crochet design:


Step 1: Foundation Chain (CH)


  • Start with a 6 CH on your wooden crochet hook or any other. Your foundation chain will be the first square because each C2C crochet block consists of three DCs.


Step 2: DC into the CH


  • Turn your work and DC into the 4th CH from the hook. To form a block of three DCs, keep adding two more DCs into the existing chains. The initial square in your C2C design will be formed by this block.


Step 3: Turn and Repeat the Process


  • After finishing the first block, DC into the chain once more by chaining 6 again. This creates a new block that continues the diagonal and will be placed next to the first one. Your project will get bigger with each successive block. But if you have a larger project, you must use the Tunisian crochet hook because these are longer than regular ones and have much control.


Step 4: Increasing the Block


  • Continue CH 6 and DC into the CH to add more blocks to your project. With every row, there are more blocks, giving C2C its distinctive diagonal structure. Blocks should be added until the project is as wide as possible. You can easily learn how to increase the crochet stitch evenly.


Step 5: Decreasing the Block


It's time to reduce the width of your project once you've reached the desired size. By turning your work and working fewer blocks, you will start decreasing rather than increasing. Until you reach the beginning corner, this procedure will taper the project's edges and produce a diagonal line of diminishing blocks. Refer to our blog for how to decrease crochet stitches.


Step 6:  Finishing


  • Then cut the yarn and weave in the loose ends.


Key Tips for Creating C2C successfully


These simple tips and tricks help you create successful C2C patterns:


  • For a neat and clear appearance, keep the yarn tension consistent.
  • Count the stitches carefully in each row to avoid any miscalculation.
  • Choose the turning method in which you are confident.
  • Try out different yarn types and patterns.
  • Before starting the larger project, you must practice on the swatch.


C2C can be frightening at first, but extremely simple once you master this technique. Chaining, double crocheting, and increasing/decreasing are just a few of the fundamental methods that may be used to create a wide range of gorgeous items. The best aspect is that you can make countless crochet creations with it because it works well with simple and complex designs.


Thursday, 13 March 2025

How to Take Care of Punch Needle Projects


The world is crazy about punch needle embroidery because it's a fun and beautiful method of making gorgeous textures. If you are doing this craft for the first time, then you might be worried about how to maintain this finest creation. To keep your craft beautiful and great for many years, we will explore easy and efficient techniques in this blog.


Tips for Taking Care of Punch Needle Projects


Punch needle embroidery is as elegant as any other craft. Taking proper care of the project is essential to prolong its life and beauty regardless of whether it's a wall hanging or pillow cover. Here are some tips that you can follow and make your project a masterpiece:


  1. Choose the Right Fabric


Any punch needle art starts with a fabric. Make sure you select the perfect material. Choose a tightly woven and stable fabric to avoid pulling and tearing. The weave should not be too loose, otherwise, it will become difficult to maintain consistent tension to hold it firmly. Conversely, if it's too tight, the fabric resists the needle and causes strain on the hand.


You can choose to work with monk's cloth due to its strength and ideal weave for securing the loops. For clear stitches, make sure the fabric is securely stretched on your embroidery hoop or frame before you begin a new project to avoid sagging, and can reduce the lifespan of the pattern. Before beginning your final project, you can experiment with other materials too, to see which is the right option.


  1. Using the Suitable Needle Size


Yarn thickness plays an important part when working with punch needle. As a beginner, we recommend you to choose the KnitPro's punch needle kit, where you can work with different needle sizes and decide the best one for yourself. With this set you get four different needle diameters that can handle a wide range of yarn thickness.


  1. Choose the Right Frame


Working with the standard wooden frame is not sufficient for maintaining the tight fabric tension required for the craft. Sometimes fabric tends to lose as you start stitching, giving you a frustrating experience. Hence, opting for a high-quality embroidery hoop or frame is recommended for a smoother and enjoyable experience.


  1. Practice Consistent Tension


Make sure the yarn tension is consistent to get clean stitches. We recommend you practice it until you get the right balance. Keeping your fabric stretched will ensure you make the stitches properly and neatly. If the fabric is not correctly tightened, the loops will be loosened and slip out of place.


  1. Begin with Outlining


Start your embroidery project by stitching the outline. You can opt for smaller, more closely spaced stitches. Consider about 6 stitches per inch for the outline and 4 for filling the shapes. This method will ensure clear and more defined edges to your design, making your project professional.


  1. Keep Track of Needle Direction


When you begin your project, check your needle direction. Make sure the open end of the needle faces the direction in which you are punching, this will ensure your stitches are moving in the right direction.


  1. Start with a Simple Project


Begin with a simple design that will allow you to practice with different techniques, especially beginners, to choose the size, which they can manage easily. This approach will help you understand this beautiful craft. Once you gain confidence and expertise, you can easily try your hands on complex patterns such as purses or wall hangings. This way you can experiment with different stitches, colors, and designs. Learn an easy tutorial to make a punch needle rug.


  1. Punch down Consistently


Punching consistently into the fabric for uniform stitches and loops. Push the needle down each time and the depth of the punch can be determined by the length of the needle.


  1. Needle Point Close to the Fabric


Instead of lifting the punch needle too high, smoothly glide the tip of the needle across. Otherwise, you get uneven loops that will make you frustrated.


Are you ready to explore some craft, read our blog on inspiring punch needle projects for beginners?


Punch needle embroidery is a fun and fulfilling art that requires maintenance to keep its allure. Make sure your crafts stay lovely and strong for many years to come by following these easy and simple techniques, which cover everything from picking the appropriate fabric. It's a beautiful way to explore creativity, additionally starting with KnitPro's punch needle set and accessories makes the project successful.


Friday, 28 February 2025

Knitting Needle Materials (What to Choose!)[pros and cons]


Selecting suitable knitting needles can significantly impact your experience, regardless of how long you've been knitting. It can be intimidating to have so many options, including circular, double-pointed, and single-pointed knitting needles. But don't worry! To assist you in selecting the ideal set for your upcoming project, let's explore the benefits and drawbacks of the various materials used to make knitting needles.

Types of Needles according to the Materials or Medium

The first step in choosing the knitting needle is the material they are made of. Different materials have distinct features, some help in your fast knitting process but a beginner must consider the materials.

  1. Wooden Knitting Needle

A traditional option that many knitters love is wooden knitting needles. There are several of them, such as birch, rosewood, and bamboo. KnitPro's wooden needles, including the well-liked Symfonie series, Dreamz, Basix, and J'dore cubics are renowned for their high quality and smooth finish.

Pros

  • Warm to the Touch: Wooden knitting needles are excellent for extended knitting sessions because they feel warm in your hands.
  • Good Grip: These are ideal for beginners because of the wood's subtle texture, which keeps the yarn in place and minimizes slippage.
  • Eco-Friendly Options: KnitPro's Bamboo series of needles is an environmentally friendly option because bamboo is a renewable resource.

Cons

  • Fragile: Wooden needles, particularly the thinner ones, are prone to splintering or breaking.
  • Slower Speed: Compared to smoother materials like metal the additional friction may cause you to knit more slowly.
  1. Metal Knitting Needles

Expert knitters like the speed and accuracy of metal knitting needles composed of stainless steel or aluminum. KnitPro provides a range of metal needle alternatives, including the smooth and long-lasting Zing, Nova series, SmartStix, and Mindful collection.

Pros:

  • Durable: Metal needles are strong and resilient.
  • Fast Knitting: You can knit more quickly thanks to their smooth surface, which makes it easy for yarn to slide.
  • Smooth Surface: Due to the smooth surface of these needles, they are suitable for tight twists or slippery fibers.

Cons

  • Cold to Touch: Especially in the winter, metal needles feel chilly in your palms.
  • Slippery: Beginners can drop the stitches due to excessive sleekness.
  1. Carbon Fiber Knitting Needles

A more recent invention, carbon fiber knitting needles combine the greatest qualities of wood and metal. In this area, KnitPro's Karbonz range is exceptional.

Cons

  • Strong and Lightweight: Despite being extremely lightweight, they are robust and long-lasting.
  • Warm Touch: The needles are warm and comfortable for knitting in winter.

Pros

  • These are expensive compared to other materials.
  • The carbon needles can break or shattered if used beyond their limit.
  1. Plastic Needles

These needles are lightweight and priced reasonably well for beginners.

Cons

  • The plastic needles are lightweight, have a good grip, and are affordable.

Pros

  • These needles are not as durable as other needles. It can be bent or broken under high tension.


A Quick Guide on Knitting Needles (Materials)


Wood/Bamboo

Stainless Steel

Carbon

Plastic

Aluminium

Speed

Slow while knitting

Fast while Knitting

Medium

Medium

Fast

Weight

Light

Heavy

Light

Very Light

Medium

Sound

Quite

Noisy while knitting

Medium quiet while Knitting

Medium while knitting

Noisy while knitting

Temperature/feel

Warm feel when touching

Cold feel

Cold feel

Warm/ slight texture

Cool/smooth


Type of Needles according to the Shape


The next, step is choosing the type of needles available in various forms. Here are some examples:


  1. Single Pointed Needles


The majority of starter kits come with these traditional needles. For flat knitting projects like blankets and scarves, they are ideal.


  1. Circular needles


Because of their versatility, circular needles can be used for round and flat knitting. They work well for larger projects like Afghans and sweaters. The Nova Cubics and other interchangeable circular needle sets from KnitPro provide simplicity and versatility. Learn more about circular needles by checking our blog on 10 reasons why we love circular knitting needles.


  1. Double Pointed Needles


These are available in sets of four or five and are used for small circumference projects such as socks, hats, or gloves.


So, choose the needle according to the project requirements and ensure you have the right length to accommodate the stitches. You can refer to our blog on how to choose the perfect knitting needle for your yarn.

The ideal knitting needle material ultimately relies on your preferences and the kinds of projects you're working on. While plastic needles are inexpensive and lightweight, metal needles offer speed and durability, wooden and bamboo needles provide warmth and grip, and carbon fiber needles combine the greatest qualities. Every knitter can discover the ideal match thanks to KnitPro's wide selection of knitting needle sets that accommodate all tastes. Don't be scared to try out various materials as you develop your knitting skills to find the ideal one. 


Saturday, 1 February 2025

The Difference Between Knitting and Crocheting Explained


It's time to cozy up with knitting needles or crochet hooks and create something interesting and beautiful designs. The two crafts – knitting and crocheting are an attractive way of expressing creativity. Some people enjoy knitting, while others crochet but both technique uses different tools. People often get confused because of a few similarities. This blog post will help you understand the main distinctions between the two and make the best decision if you're new to the crafting world.

Knitting and Crocheting- unlock the creativity

Knitting

In knitting, the rows are created by a series of stitches using two or more needles. This method makes a stretchable, soft fabric perfect for garments, accessories, and home decoration. There are two basic stitches: Knit(K) and Purl (P) and you can choose from various needles, such as circular, double-pointed-needles, and straight needles (DPNs). All these varieties are frequently used in multiple projects. To learn more, Find the best knitting needles by KnitPro on our blog.

Keep in mind, while choosing the needle, check the pattern instructions on the yarn label. As a beginner, we recommend you to start with a small swatch using the same yarn, and needles that you would like to use in your final projects. Choose KnitPro’s knitting needle set, which contains needles of various sizes. These tools are available in multiple materials like wood, metal, steel, aluminum, bamboo, and more.

Crocheting

In crochet, you use a single crochet hook, and loops of yarn are pulled through one another to produce fabric. Crocheting is done one stitch at a time, compared to knitting, which calls for several stitches to be active on the needles. With these loops, you create essential stitches like single, double, treble, and more.

Start with a slip knot and then make a foundation chain which is super easy. Make sure you have the correct hook size for your project, otherwise you won’t get the desired result. Along with the basic tools, consider using supporting tools like stitch markers, a measuring tape, and scissors. Before starting work on either of the crafts, create a gauge swatch to see how the technique works and your projects will appear.

Fabric created by both techniques

The fabric created by the knitting using the knit and purl stitches is stretchy and woven. The best part is that projects like socks or hats work wonderfully where shaping is required

The Crochet fabric creates denser, less stretchy, and textured items. It is much better to create amigurumi and home décor projects.

Which one to choose?

It all depends on your objectives and the type of crafts you want to make. So, make a decision wisely.

For knitting:

  • If you adore the appearance of smooth, flexible garments, go for knitting.
  • To make intricate designs like lace or cables.


For crochet

  • For items that are completed more quickly, crochet is the best choice.
  • If you like strong designs and striking textures.
  • If you're looking for a craft that's simpler to master.

Both knitting and crocheting have special benefits and appeals. Knitting is perfect for clothing and elaborate designs because of its smooth and flexible results. Contrarily, crocheting excels at speed and striking textures, which makes it ideal for last-minute gifts and decorations. Whether you decide to use a crochet hook or knitting needles, both crafts let you create meaningful, handcrafted items while embracing the season's beauty. So, gather your yarn, hooks, or needles of KnitPro and have fun with your knitting and crocheting!

We recommend you try both crafts and see, which is the best for you. If you started learning one technique, try to grasp the other too.


Friday, 24 January 2025

How to Crochet Crab Stitch


The Crab Stitch in Crochet is the Reverse single crochet (US crochet abbreviations) and reverse double crochet stitch (UK crochet terms). The name crab comes from the movement of the creature that goes ‘backward’ in nature).  If you are unfamiliar with a crab pattern, refer to our blog on how to crochet a crab stitch. In a standard double crochet stitch, you insert your crochet hook into the next stitch to the left, while in a reverse double crochet(RSC), insert the hook to the right stitch. The only difference between the two is the location of the stitch. If you know the basic crochet stitches, it would be easy to learn reverse single crochet. This post will explore the reverse single crochet, the steps to create it, and tips and tricks to make your project versatile.

Remember, you will find a lot of differences between the crochet terms or abbreviations all over the world. There are two standards- UK and US, both use the same stitch name like double and treble but indicate the different stitches! Like in the UK, a double crochet is a single crochet in the US, while a US treble is a UK double treble.

What is reverse single crochet?

Reverse single crochet is simple and works exactly like a single crochet but in a different direction. Instead of working from left to right, you work from right to left. It makes twisted cord edging and is often used to make the edges smooth and neat. You can use it on bags, blankets, and garments.

What tools do you need to crochet a reverse single?

Before starting any project make sure you have the right tools. Here are some points that you can consider:

  • You can use a single-ended crochet or any otherhook type, which is comfortable for you.
  • Use any yarn weight but the medium worsted yarn is a good choice for clean stitches.
  • Have stitch markers, scissors, and a darning needle to assist with your project.

A step-by-step method to crochet a reverse single-stitch

In the beginning, the stitch looks a little awkward so keep practicing and it will become easier. Here are the steps that will help you in your project:

Step 1: Insert the hook into the stitch

  • The first step is to insert the crochet hook into the correct In reverse single crochet, insert your hook into the right of the stitch. It’s a simple and easy technique. You don’t need to turn your work before beginning the row and the round in the reverse single stitch.

Step 2: Yarn over

  • Yarn over after inserting the hook. This step may feel awkward at first because you’re working backward.

Step 3: Pull the yarn through

  • Once completing the above step, pull the yarn through the stitch, and now you will have two loops on the hook like in a single crochet.

Step 4: Yarn over again

  • This is the same step that you follow in a single crochet. Insert the hook, yarn over, and pull through the loops.

Step 5: Pull the yarn through

  • After completing all the steps, pull the yarn through both the loops and repeat the steps to complete the entire row. At the end add a slip stitch.

Now, you can go ahead, and practice this stitch with all single to double-ended crochet hooks and get a unique look every time after incorporating this in your projects.

Common mistakes and how to fix them

  • It is easy to miss the stitch when working on the reverse single crochet, so count your stitches every time.
  • Turning your work accidentally, keep in mind do not turn your work when working reverse single crochet, otherwise; you won’t achieve the desired result.
  • If you pull the stitches too tightly, then it will be difficult to insert the hook into the next row or stitch.
  • Avoid placing the hook into the incorrect stitch. Otherwise, you get uneven edges.

Tips and tricks to achieve the perfect look

  • Practice the directional work, as you know in the reverse single crochet you work from right to left. Make sure you regularly familiarize yourself with this technique.
  • Keep the yarn tension consistent to achieve a neat and uniform appearance.
  • Stitch markers are an important tool, that is useful to keep track of your progress. It will help you to identify where you need to place your stitches.
  • Try different crochet hook sets to see how your stitches vary in appearance.

Reverse single crochet is a versatile technique that adds versatile edges to almost any project. Whether you are applying this method to the blanket or bags, it provides a polished finish to your project. Moreover, this stitch is great for adding decorative edges to blankets, bags, and many projects.


Friday, 10 January 2025

Color of the Year 2025 and How to Knit and Crochet with it


As we are stepping into the 2025 year, the design world is thrilled with the announcement of the color of the year: Mocha Mousse (PANTONE 17-1230). This rich, warm brown evokes sophistication and comfort, making it a versatile choice for knitting and crocheting projects. Mocha Mousse is more than color but an experience and it is the perfect companion for both crafts that seek beauty and uniqueness.

It is a harmonious blend of earthy tones similar to the fresh aroma of coffee. It’s up to you, how you take this opportunity to create elegant fabric with knitting needles. Let’s explore how you will incorporate Mocha Mousse into your project.

 What Knitting Projects Can You Create with Mocha Mousse?

Adding this beautiful color to your projects can add timeless elegance and coziness. Here are some ideas that will inspire you to make a variety of items:

  1. Sweater and Cardigans

With its ability to provide warmth and style, a Mocha Mousse cardigan or sweater can quickly become a wardrobe mainstay. The neutral tone goes perfectly with various hues, making it a versatile piece.

Suggestions: You can use natural fiber like wool that enhances the earthy feel of Mocha Mousse. Use circular knitting needles to make sweaters or cardigans that are perfect for larger projects.

  1. Standout Chameleon Shawl

You can knit accessories in this shade that provides a subtle yet impactful addition to any outfit. The elegant brown complements both casual and formal attire.

Suggestions: The chameleon shawl can be adjusted with different yarns and gauges. The knitting needle for shawls depends on the size of the pattern. For smaller sizes, you can use straight needles but circular needles are perfect for versatile and larger sizes. Read out our blog on how to construct a knitted shawl from start to finish.

  1. Knitting home décor

To add a feeling of calmness and coziness to your living area, think about making table runners, blankets, or cushion coverings out of Mocha Mousse. The trend toward natural materials and peaceful settings is in line with the earthy tone.

  1. Hats and gloves

Keep yourself warm during the cooler months with cozy hats and gloves. Because of color versatility, it ensures accessories will coordinate with various outwear.

What Crochet Projects Can You Create with Mocha Mousse?

Here are some inspiring crochet ideas that use the trending color, Mocha Mousse:

  1. Cozy cardigan

A crochet cardigan in a Mocha hue is the perfect addition to any wardrobe. For comfort, use a soft yarn blend. To improve the pattern, think about using textured stitches like puff or bobble.

Suggestion: A chunky, baggy cardigan with front pockets.

  1. Textured Pillow Covers

Crochet pillow covers in Mocha Mousse create cozy by adding textured patterns such as popcorn, and shell.

Suggestion: You can pair with neutral or contrasting shades with a modern vibe.

  1. Slouchy Beanie

This earthy-toned slouchy beanie is both fashionable and functional. It is a popular accessory since the hue goes well with fall and winter.

Suggestion: For added charm, attach a tiny leather tag or a faux fur pom-pom.

  1. Wall hanging

Make a crochet wall hanging in the bohemian style with Mocha Mousse color. Add tassels, fringes, or knots reminiscent of macramé to further the earthy theme.

Suggestion: For more dimension, mix with lighter hues like cream or beige.

Tips working with Mocha Mousse

  • To create a striking effect, combine neutrals (beige, white) or bold accents (mustard, teal)
  • While working with darker tones use proper lighting for visibility.

Incorporating Mocha Mousse in your knitting and crochet projects offers a tremendous opportunity to create pieces that are trending and timeless. Due to its versatility and warmth, it is an excellent choice for a variety of creations, from personal accessories to home décor. As you explore this sophisticated shade, using KnitPro’s crochet hook sets you’ll find that it not only enhances your project's appearance but also brings a comforting and grounding presence to your handmade collection.