Wednesday, 7 December 2022

What is Yarn over needle in Knitting?

Knitting a yarn over creates a small hole. This is the prerequisite for many patterns such as the popular Ajour pattern, which is very often used in knitting patterns. Yarn overs are super easy to knit. However, you have to pay attention to where the working thread lies in front of the yarn over and then wind it correctly around the right needle. Here in this blog we show you the different variants of yarn overs that are available.

Yarn over needle in Knitting

Yarn overs are represented in many knitting patterns, so it is also important to master this technique and to know the important points and variants of yarn overs. Not only certain patterns, with the help of yarn over you can also knit increases, because after a yarn over you automatically always have one more stitch on the needle. Yarn over can also be used to easily work buttonholes into the knitting project.

The first variant - knit a yarn over between a right and a purl stitch

With this variant, your yarn over follows after a right stitch. After your yarn over, a purl stitch is knitted. Here the working thread lies first behind the work.

Step 01: Wrap the working yarn that lies behind your work around your right needle from back to left front to knit a purl stitch. If you were to purl the next stitch, you would not have knitted a yarn over.

Step 02: Now wrap the working thread again from right to left around your right knitting needle. And now you have the envelope.

Step 03: Now knit the next stitch on the left as normal.

The second variant - knit yarn over between two right stitches

In this variant, your yarn over follows a knit stitch. Immediately after the yarn over you also knit a right stitch so that the yarn over lies between two right stitches. Your working thread lies in front of the yarn over behind the work.

Step 01: Wrap the working thread that lies behind your work around your right needle from back to left front.

Step 02: Knit the next stitch on your left knitting needle. To do this, insert the right needle into the stitch from right to left as usual, but with the thread in front of the work.

Step 03: Wrap the working thread around your right needle from back to front, knit the stitch as normal and let it slide off your left needle.

You now have a knit stitch on your right needle and a yarn over in front of it. The hole under the yarn over is clearly visible.

The third variant - knit a yarn over between a purl and a knit stitch

This variant is the simplest. After the left stitch, the working thread is already in front of your work. Normally you would now bring the working yarn to the back to knit a right stitch. However, you just leave it in front of your work.

Step 01: Insert the right needle into the stitch from right to left.

Step 02: Wrap the working yarn that is in front of your work around your right needle.

Step 03: Now knit the stitch on your left knitting needle as usual.

Another little tip - you can easily identify errors with yarn over by the hole, either it is too small or there is no hole at all. Then you have either wrapped the working thread around the needle the wrong way round or you have made a mistake in the execution.

"Creativity is a wild mind and a disciplined eye" - Dorothy Parker

For a flawless knitting experience, we not only offer you these tips, but of course also the best knitting needles. Choose Knitpro knitting needles and get started on your next project right away.

Do You Like this Knitpro Blog? Click here for more Knitpro Blogs like this.

Monday, 14 November 2022

How to Knit the Crochet Cast-On

For large projects like shawls or blankets where many stitches have to be cast on, a good alternative to the normal cast-on is to cast on the stitches with a crochet hook. This way you don't have to measure the yarn beforehand and worry about how much yarn you need for the necessary stitch cast-on. Most of the time it happens that we have unwound too much yarn and it ends up hanging down. You don't have to do that with this technique and the stitches also look prettier. The result is a very even, beautiful edge that looks like it has been bound off. When you crochet the stitches, you get a nice solid edge, but not a hard one.

Cast-on stitches with a crochet hook

For this technique you need a suitable crochet hook in addition to the knitting needles you need for the project. This should be the same gauge as your knitting needles. This technique can also be used with a knitting needle. In this blog we will show you both methods, with a crochet hook and with a knitting needle.

To start, you need a starting stitch on the knitting needle in your left hand. The end thread only needs to be so long that it can be easily sewn up.

Now take the crochet hook in your right hand and insert it into the stitch from the front. Get yarn and pull the loop out of the stitch. Now we are ready for the next stitch. We get the thread over the hook and pull the loop through the stitch on the crochet hook. This forms the second stitch, but do not pull it too tight. It should later be easy to lift off the knitting needle.

In order to be able to crochet the next stitch, you must now bring the thread behind the needle again, i.e. guide the wool backwards under the knitting needle. Now comes the next stitch.

Bring the thread over the needle and pull it through the loop. This is how the third stitch is crocheted. Pass the thread back under the knitting needle. This is how you crochet stitch by stitch, as many as you need for your project. If you have a few stitches on the knitting needle, you will see that this technique creates a nice row of stitches as an edge.

Cast-on stitches with a knitting needle

If you don't have a crochet hook handy, you can also use a knitting needle to perform this technique. It also works really well with a knitting needle.

So instead of a crochet hook, take a second knitting needle in your hand. The first loop is stretched out on the right as when knitting on. The loop can be a bit larger, because now we push the thumb in between, get the thread like a right stitch and clamp it between the knitting needle and the thumb. And so the wool can easily be pulled through the loop. Here, too, after tightening the new stitch, the wool must be pulled backwards under the knitting needle in order to return to the starting position. The last stitch is the loop, this is simply hung on the left needle. In the first row, knit the loop to create a nice corner.

No matter which method you choose, you can find the best Crochet Hooks and Knitting Needles at Knitpro

“Great things are done by a series of small things brought together.” -  Vincent Van Gogh

 Do You Like this Knitpro Blog? Click here for more Knitpro Blogs like this.

Monday, 31 October 2022

How to Crochet Dragonfly Stitch?

After you learn the basic crochet stitches and make some quick projects, it’s time to move on to challenging patterns. The Dragonfly Stitch is an interesting crochet stitch. If you are wondering how to crochet the dragonfly stitch, we’ll walk you through it. It is a beginner-friendly lace stitch that adds to the beauty of any simple project.

In this blog, we’ll see how it’s made but first gather your supplies.

        Crochet hook – You will need a crochet hook, this can be any hook (single-ended, double ended or even Afghan/ Tunisian hook). Just make sure you are comfortable with it. You can use bamboo, wood, steel, aluminum or anything. Having the right crochet hook size is most important. If you are following a pattern, you will have all the details. If you are planning your own design, you can guestimate with your yarn. Most yarn labels have the information. You can also make a gauge swatch to see if you are getting the look you wanted.

        Yarn – The yarn for the dragonfly stitch can be anything from your stash or as a pattern instructs. Do not attempt with heavy-weight and light-weight yarn, stick to medium ply so that you can see the stitches easily.

After you have the supplies in hand, have this handy chart of the basic crochet stitches in UK and US terms.

U.K.

U.S./Canada

slip stitch (ss)

slip stitch (sl st)

double crochet (dc)

single crochet (sc)

half treble (htr)

half double crochet (hdc)

treble (tr)

double crochet (dc)

double treble (dtr)

treble/triple (tr)

triple treble (trtr)

double treble/double triple (dtr)

tension

gauge

miss

skip (sk)

yarn over hook (yoh)

yarn over (yo)


This pattern in UK crochet terms is a small swatch of 10X10 cm.

Step 1 – Make a slip knot on the crochet hook. Start with a chain of 12 plus 3 extra for turning rows and round for the treble crochet (tr) stitch.

Row 1 - Make 1 treble crochet (tr). To make a treble crochet stitch, yarn over the hook and insert it into the 4th chain. Pull up three loops on the hook. Yarn over and pull yarn through two loops on the hook. Yarn over and pull the loop through. You will have a treble crochet stitch on hand. Continue to make treble crochet stitches in each chain until the end of the row.

Row 2 - Chain 3 and treble crochet (tr) 5 stitches. Make 1 chain. Do not chain it on a stitch but in the air. Skip 1 stitch and then make treble crochet the other six stitches.

Row 3 – Start with a chain of 3 stitches. Make 2 treble crochet (tr) stitches. Chain 3 in the air and then skip 3 stitches. Make 1 treble crochet stitch in the space of the chain of the row below. Once again make a chain of 3 stitches in the air and then skip 3 stitches. Finish the row with 3 treble crochet stitches.

Row 4 – For this row, chain 3 stitches and make 1 treble crochet (tr). Chain 4 stitches in the air and then skip 1 stitch. Make a double crochet stitch on the treble crochet stitch (tr) of the row below. Once again follow the pattern of 4 chain stitches in the air, skip over 1 stitch and finish off with 2 treble crochet (tr) stitches.

Row 5 - Chain 3 and make 1 treble crochet (tr). Continue with 4 treble crochet (tr) stitches in the space formed by the chains of the row below. Make a treble crochet 1 above the double crochet of the row below, 4 treble crochet in the space formed by the chains of the row below and 2 treble crochet.

Row 6 - Make 1 treble crochet in each stitch.

Continue the steps of crochet rows 2 to 6 till you have reached the desired length or the pattern instructs you to.

With these steps, you can easily crochet this fancy lace texture. The Dragonfly Stitch adds to the beauty of blankets, scarves, or garments.

Friday, 14 October 2022

Things Every Knitter Needs

Knitting is a fun craft, after all, you only need three simple things: knitting needles, yarn, and creativity.  But, there are also a few “things” that can make knitting a lot easier and fun. Be it the beginners or the advanced crafters, every knitter needs some help. Before you go and get your hands on everything possible, check out our list of knitting essentials.

1. Knitting Needle Sets

In knitting, of course, you will need knitting needles, but the collection is never complete until you own all three types of needles and the popular sizes. A pair of single-pointed needles are handy to knit most rectangular projects in back-and-forth knitting. The circular needles are two 10 and 13 cm length tips joined by cables varying between lengths of 25cm to 150cm. If you do a lot of knitting you might want to get an interchangeable circular needle set which will offer flexibility. You won’t need new sizes for each project, as a set offers multiple. Plus, if your project calls for changing needle size or even the cable length you can easily go ahead with it. Double-point needles are ideal for knitting small things in the round, like mittens or the top of a hat.

Many times you may need to switch needles. You may start a project on circular needles, then switch to double points as you get close to binding off or knit different sections on different needles, so it is always recommended to include all needles in your collection.

Knitting Needles Set

2. Yarn

Obviously yarn, given the fact that knitting is fiber art. There are so many types, different weights, different fibers, different colors, etc of glorious yarn. Too much to possibly mention, but suffice it to say, you never have enough. For every project, you need different yarns. The ones that work best for socks may not be the right fit for a sweater, the ones you use to practice new techniques may be only used for practice and not any actual project.

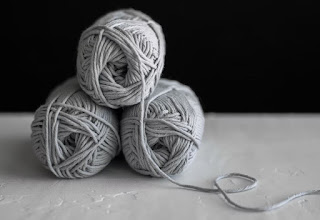
yarn

3. Scissors

A pair of sharp scissors is always handy for a maker. You need it to cut the yarn when you finish your project or want to switch colours.

Scissors

4. Tapestry Needle

A basic need for any knitter, a darning needle is a large sewing needle, with an eye big enough to accommodate bulky yarn. You’ll use the needle to weave in the tails of yarn left after you bind off your project or for different techniques and even seam projects together.

5. Stitch Markers

Like its name, stitch markers are used on your needles to mark particular points in your pattern. Some markers can be directly put onto a stitch such as locking ones, while cute round designs stay on the needles for reference in a particular stitch or pattern.

Stitch Markers

6. Measuring Tape

As a maker, you would want to work on your own designs and for that measuring tapes are handu. Also many times, a pattern mentions inches, rather than rows, so it's better to keep them on hand. Measuring tapes will not leave you guessing.

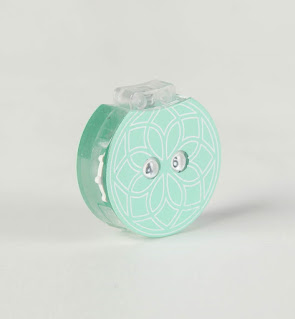
7. Row Counter

Some patterns require keeping track of exactly how many stitches and rows you have knit, and a row counter helps you keep an accurate count.

Row Counter

Know More: How to Use Row Counter for Knitting

8. Blocking tools

Yarn blooms beautifully after being blocked and blocking tools assist you in this. Any yarn of any project requires some pampering and blocking does that.

Know More: How to Block your Knitting

With the above knitting-related things, you are ready to knit anytime and anywhere!


Tuesday, 13 September 2022

Learn How to Knit Flat Using Circular Needles

Circular knitting needles are very versatile, they are suitable for both round and flat projects. When you crochet flat projects with circular knitting needles, you have the great advantage that the weight of the entire project is distributed over both hands at the same time and not on one needle, as is the case with single knitting needles. Another advantage is that larger projects have much more space, with interchangeable knitting needles, needle size and cable length can be individually selected and put together. So you can put together the ideal circular knitting needle for your project.

Learn How to Knit Flat Using Circular Needles

Single pointed knitting needles are long and rather unwieldy. Especially if you like to take them with you and transport them. It's different with circular knitting needles, because they have such short needles and flexible cables, they can be conveniently packed in your handbag and taken with you. And because you can slide the knitting onto the cable, there is less risk of stitches slipping off the needle when you put the work down or take it out of your pocket.

Types of Circular Knitting Needles

Circular Knitting Needles consist of two short knitting needles connected with a cable. There are two types of these, the fixed circular knitting needles and the interchangeableknitting needles. As the name suggests, fixed circular needles are firmly connected to one another, embroidery needles and cables cannot be unscrewed. Knitpro offers a wide range of different needle sizes and cable lengths.

Interchangeable Knitting Needles can be assembled individually. With an interchangeable knitting needle set you are perfectly equipped for all imaginable knitting projects. As Knitpro, we also offer a large selection of many different interchangeable knitting needle sets.

How to Knit Flat Projects with Circular Knitting Needles

Knitting with circular needles is the same as with single pointe needles. For a flat project, simply crochet in rows, so after each row turn your work and knit back and forth.

You can also crochet round projects in rows and then sew the ends together, like hats or loop scarves. But with circular knitting needles you also have the option of knitting the project in the round and thus saving on sewing. This not only gives you an invisible transition without a seam, but also saves you valuable time. With circular knitting needles, the choice is yours. You can even knit entire sweaters without having to sew anything - so-called raglan sweaters. You can also switch from rounds to rows in a project to knit specific areas of a project.

"What is conceivable is also feasible" - Albert Einstein

Everything imaginable can be realized with our circular knitting needles. Check out our wide range of Fixed and Interchangeable Circular knitting needles and try your hand at knitting your next flat project with circular needles. You will be enthusiastic.

Did you like this Knitpro article and would you like more? Then click here for more posts like this from Knitpro.

Wednesday, 3 August 2022

How to Read Charts - It’s Easier than you Think

In many knitting instructions, the instructions and the pattern are explained using a knitting chart. For beginners, reading a knitting chart is usually difficult and seems very complicated. Therefore, it mostly discourages them from using this tool. In this blog we would like to explain to you how easy it is to read a knitting chart and how to successfully create your successful knitting pattern.

Knitting Chart for Beginners


What is a knitting chart?

A knitting chart is a diagram in which the individual stitches to be knitted are shown in a diagram in such a way that you can easily see the individual sequences stitch by stitch and row by row. Each square of a knitting chart represents a stitch and each row represents a round. The numbers in the margin indicate the row numbers. The stitches are marked with individual symbols. Each knitting chart should also include a legend as these symbols are not consistent and the same stitch may be represented by a different symbol in a different pattern. The knitting chart usually shows the front of the finished knitting. Some knitting charts only show the right rows and the text usually contains a note that the back rows are worked with purl or knit stitches, for example.

Red lines in the instructions make the repeating pattern clear. Stitches outside the repeat show how the repeat is integrated into the knitted piece or how edge stitches are worked.

How to read the knitting chart

Unlike reading a book, knitting script is read from bottom to top. The starting point is the bottom right corner and you work your way up row by row from the bottom.

The right rows, i.e. the rows with odd numbers, are read from right to left when knitting in rows. The back rows, the even-numbered rows, read from left to right. In the right rows, work the stitches exactly as shown.

Instead of rows, you can also knit in rounds. This is even easier since you don't turn the work over. The even numbers can be worked in the same way as the odd numbers. Here you just have to read each round of the pattern from right to left and only work the stitches that are shown.

How to don't slip in the knitting pattern

Slipping in a row while knitting is annoying. This destroys the whole pattern and you have to unravel the work again. That costs time and nerves. To keep that from happening, we have awesome Knitting Needle Cases that have a built-in chart holder and a magnetic ruler to help you mark rows so you don't slip with rows. Take a look at our wide range of products at Knitpro right away and save valuable time and nerves right from the start.

Reading a knitting chart is not as complicated as it looks and once you get the hang of it, it is actually much easier than the written instructions and also clearer.

"A picture is worth a thousand words." Napoleon Bonaparte

Knitting charts open up a completely different way for you to have a special and easy knitting experience. At Knitpro you will find the most beautiful and useful accessories and chart holders for your charts.

Do you like this Knitpro blog? If yes please check our similar blog click here.

Friday, 10 June 2022

Which Crochet Hooks are the Best?

This is one of the most difficult decisions, especially for beginners. Many questions arise, such as "Which crochet hook should I buy?" "How do I know if these are the good crochet hooks for me?" "What should I look out for when buying" or "How do I find the best crochet hooks for me? "

Don't worry we can answer all of these questions with this blog today and help you decide on the best crochet hooks for you and link you to your future favorite tools.

First of all, in general terms, when buying crochet hooks you should pay attention to a few points such as what types of projects you mainly want to crochet or what yarn counts you often work with. Do you like the feel of metal in your hands, or do you prefer wooden needles? Or would you prefer ergonomic crochet hooks? Once you have answered these questions, the choice will not be difficult for you.

crochet hooks

Here we present some of our most popular crochet hooks in more detail so that you can see and compare the different advantages and disadvantages.

Knitpro Waves Crochet Hooks

The Waves series is one of our most popular, whether for beginners or experienced users. The bright colors are fun and the soft grip gives you a good grip on the crochet hook, which is easy on your wrists and hands. These crochet hooks are suitable for all kinds of projects and come in handy sets with the most common sizes, packed in a nice case.

Bamboo

Bamboo is a very popular raw material for crochet hooks. If you would like to feel the warm feeling of wooden needles in your hands, these crochet hooks are just right for you. Thanks to the perfect finish, these crochet hooks glide comfortably through the stitches.

Trendz

Cheerful, colorful acrylic crochet hooks are particularly suitable for beginners. These wallet friendly crochet hooks come in many different sizes and also available as option Tunisian Crochet Hooks and Double Sided Crochet Hooks.

Jumbo

These jumbo crochet hooks in large needle sizes are perfect for particularly large projects with thick wool. Crocheting with thick crochet hooks and wool is ideal, especially for beginners, in order to recognize and practice the stitches well. You will find that your projects will progress particularly quickly with these needles.

Zing

A fine line of crochet hooks - our Zing crochet hooks are made from featherweight aluminium. They have a pleasantly smooth surface that allows you to slide through the stitches without much effort and thus enable a fast workflow. The Zing crochet hooks are available as a handy set.

"Great things are done by a series of small things brought together." -Vincent van Gogh

Did you like this Knitpro article and would you like more? Then click here for more posts like this from Knitpro.

Monday, 9 May 2022

How to assemble and use a Yarn Winder?

Yarn winders shape your yarn into balls and cakes which are perfect to work with. Whether you knit or crochet, you need to work with yarn. The yarn needs to be kept in the best condition and yarn winders get it done for you. Once you get the yarn winder you have the solution to your yarn problem. But now you got a question on hand- how to assemble and use the yarn winder. So, here we are with step-by-step instructions.

Step 1: Attach your ball winder to the edge of a counter or table.

Yarn winders require some space to work so it’s best to attach yours to a counter or table. On placing the yarn winder on a table you will find a clamp that goes below the table that can be adjusted to tighten the hold. KnitPro ball winders come with an anti-skid rubber pad that prevents the winder from sliding and scratching the table.

Clamp your yarn winder to the table, being sure to leave some space for the yarn to feed properly around the metal guide arm. And, if you have a swift/ skein winder to unravel the yarn, you need space to set it up right next to the winder.

You can watch our video of assembling the yarn winder.

Step 2: Find the end of your yarn

Now you need to find the end of your store-bought yarn and you have to be patient about it. Yarns are wound in different ways-into skeins, tight hanks, messy balls, etc. so the end may be difficult to locate.

To locate the ends easily and stretch out the skein, you can use swift winders also known as skein winders. The other option is by hand but then again you might end up losing patience. The swift winders open up like an umbrella. You can place the skein or hank on the winders and easily find the ends and individual strands. This further helps in inspecting yarn as they are stretched over the winder. Make sure to not overstretch the yarn as it loses its elasticity.

Step 3: Attach the end of your yarn to the metal feeder.

After you finish the end of the yarn, place it on the metal feeder and lock it in place. You need to loop in the yarn so that it does not come loose during the winding process.

Step 4: Starting winding slowly

With all things in place starting winding. Make sure your first few turns are very slow, to ensure that that little tail gets tucked down into the yarn cake. You’ll be able to pull it out later.

Step 5: Keep winding in the same direction

After a few rounds of winding you can speed up but always keep going in the same direction. In a few minutes, you will have the yarn cake ready!

Now that you are done winding your yarn, you can store it in a yarn box or use a yarn dispenser to work on your knitting or crochet project. Happy crafting!


Monday, 14 March 2022

The Best Knitting Needles for Sock Knitting

Did you know socks were the oldest knitted artefacts? Does this fact want to make you knit some socks? So, let’s get you started. Sock knitting might sound like an easy project but it’s only easy when you have the right set of knitting needles. Knitting socks majorly depends on the needles and your skills to use them properly. The options are generally double pointed, fixed circular and interchangeable circular needles. Knitters can use any or all of these tools for knitting socks. 

How to choose the best knitting needles for sock knitting?

When taking up the project of sock knitting, you should look out to prevent hassles of knitting small, in-the-round projects with fine-gauge yarn. You will be facing dropped stitches, cramped hands and more. Also, detailed knitting work like making socks requires more focus and concentration, So, if you haven’t got the right knitting needles set before, now is definitely the time.

You should go for needles that offer the right amount of grip, along with being non-slippery material while not preventing the smooth flow of stitches. Here is our suggestions for the best knitting needles that you can choose for knitting socks.

Knitting socks on Double Pointed Needles (DPNs)

The double-pointed needles (DPNs) are among the best tools for knitters. Allowing knitting from both ends, these needles are convenient for knitting in-the-round. The double-pointed needles come in a set of 5, in different materials.

Socks are usually knit in smaller sizes, so the double pointedknitting needles need to be narrower. We also suggest choosing ones that you have a better grip on. Bamboo or wood, carbon or plastic, aluminium or stainless steel, go for the needle material that you have the best understanding of. There are also special square double-pointed needles that are best for comfortable grip.

Sock knitting on Circular Needles

Made for smaller round circumference projects, circular needles are among the best knitting needle sets. The magic loop technique is a more comfortable choice for knitters to use for sock knitting. The cable that connects the tips of the circular needles is an advantage for knitting socks. This needle set has fewer opportunities for dropped stitches or other mistakes and even the best chance of taking a break from the project. In the range of circular needles, there is the choice of fixed circular knitting needles as well as interchangeable circular needles.

In the fixed circulars, the cable is permanently fixed but the needles are available in different sizes with varying cable lengths. This needle set is convenient to use. Choose the small-sized needles. This particular set has the least chance of ever losing a needle in the middle of the project.

In the case of interchangeable circular needles, the cable lengths can anytime be changed according to your preference and need of the project. These knitting needles come with cables of different lengths with cable connectors and cable keys to make the change smoother. You can anytime alter the length and dimensions of your sock project.

So, now that you know all about the knitting needles for the sock project, take a look at KnitPro’s website. Know more information about knitting needles and accessories. We have an incredible range of products made by knitters for the knitters.

Wednesday, 19 January 2022

Knit Pro Tunisian Crochet Hook


The Tunisian art of crocheting is a very old and beautiful technique that combines the advantages of two techniques - namely the simplicity of crocheting with the aesthetics and variety of patterns of knitting. But this technique also opens up completely new possibilities for creating designs and patterns that are only possible with Tunisian crocheting. In a different way, Tunisian crochet is also called Afghan crochet. But there is no difference between Tunisian crochet and Afghan crochet. The materials and needles required are the same.

At Knit Pro we have created the most beautiful and best Tunisian crochet hooks for you, so that you can conjure up your works full of joy. With this blog we would like to introduce you to our various Tunisian / Afghan crochet hooks.

But first the basics of the types of Tunisian crochet hooks. There are two different types of Tunisian crochet hooks. The first and often used is the one-sided Tunisian crochet hook. The hook is on one end of the tool and there is a plug on the other end of the tool. You can also find different cables for this purpose. These are just like the cables of the Interchangeable Knitting Needles. A brief information about this: Our Knit Pro Interchangeable Knitting Needle cables are also compatible with our Interchangeable Tunisian Crochet Needles. So you don't have to buy extra cables and you can use them for both needles. Practical right?

The second variant of the Tunisian crochet hooks are the double-sided crochet hooks, here the tool has a barb on both ends.

These two techniques are similar, have a lot in common, but are still very different.

While the one-sided Tunisian needles are often used for flat projects, the double-sided Tunisian Crochet needles are mostly used for round projects.

At Knit Pro you will find a wide variety of different Tunisian crochet hooks made from different materials. Here is something for everyone. Now we would like to introduce you to some of our best needles.

Symfonie Interchangeable Afghan / Tunisian Crochet Hook

The series Symfonie is very well known and popular due to the Knitting Needles and you can expand your Symfonie series with our Tunisian Crochet Hooks. Made of the finest Birchwood and a unique coloring, these needles are something very special. The cables are easy to connect and with smooth join that promises a easy stitch flow without any snagging. These needles are available in a wide variety of sizes.

Symfonie Interchangeable Afghan / Tunisian Crochet Hook

Trendz Interchangeable Afghan / TunisianCrochet

Our colorful and bright Trendz needles are represented as Tunisian Crochet Hooks. These acrylic needles are especially ideal for beginners. These crochet hooks simply allow easy handling of slippery yarns and pick-up stitches in a fast and easy manner. Smooth joins to allow for easy and snag free sliding of yarn. These well priced Tunisian crochet hooks are simply perfect in all aspects for the beginners.

trendz afghan tunisian interchangeable crochet hook


Bamboo Afghan / Tunisian Crochet

No matter how big your project should be, they are no problem for our Bamboo Afghan / Tunisian Crochet Hooks. You will be able to crochet your projects with the utmost comfort without any snagging or hassle.

These beautiful needles are made from the finest Japanese bamboo and have a perfect smooth finish. As if that weren't enough, the connectors are still plated with 24 carat gold and that promises the highest level of happiness when crocheting.

You will love our Knit Pro Bamboo Tunisian Crochet Hooks. Take a look at them on our website.

Bamboo Afghan / Tunisian Crochet

Trendz Traditional Double Ended TunisianCrochet

Bright colors that will fill you with happiness while crocheting. Our durable, strong and flexible Double ended Tunisian crochet hooks are well priced and absolutely suitable for beginners. They slide very easily through the mesh and have a smooth surface.

Trendz Traditional Double Ended TunisianCrochet

Trendz Tricot Afghan Traditional Crochet

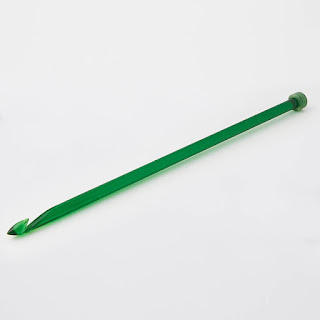
Make your Trendz Tunisian Crochet Hook collection complete and buy our Trendz Tricot Afghan Traditional Crochet needles. These are provided with a stopper at the end. These types of Tunisian crochet hooks are especially suitable for beginners.

Trendz Tricot Afghan Traditional Crochet

If you have not dealt with the Tunisian Crochet before, we have just given you some good reasons to do so right away. Take a look at our Tunisian Crochet needles on our website and start "Hakking" right away.

"Imagination means nothing, without doing." Charlie Chaplin

With that in mind, do something for your imagination and find the tools for it at Knit Pro.

Do you like this KnitPro blog? Do you want to read other interesting things about Knitting & Crochet? If yes please check our similar blog click here.